Saturday, September 15, 2012

How to Hem Jeans

Here is another sewing project.  How to hem a pair of jeans.  Sometimes we find the perfect pair of jeans, but they are too long on the inseam.  (A common problem in my family).  In this case, my son, who is still growing, found a pair of jeans when we were back to school shopping and they were the colour and style he liked, and fit correctly, but were a bit too long.

No problem, Mom to the rescue!  Time to hem those jeans.

First you need to have the wearer put the jeans on with some shoes and pin the length so that the back of the jean pant is just brushing the floor at the back of the heel.
Then you will have 1 pinned jean leg, like this.


Here is another view.


Next you will want to fold the jeans over and make sure they are PERFECTLY FOLDED IN HALF.
MAKE SURE YOU PLACE PINS ON THE FOLD LINE.  SEE PICTURE BELOW.  You will need these pins later, it is a very important step. 


Look here how I ensure the pocket area is lined up too.


Next you will measure 1 1/8" from the folded line.  This is your cutting line.


Next you will mark this cutting line with tailor's chalk.  This can be bought at your local fabric store for about $2.


Look at this last picture above.   You will see the pants still folded as exactly in half as possible, and your cutting line clearly marked in tailors chalk.  The beauty of tailor's chalk is it brushes away.  There won't be any lasting marks in the fabric.

Now cut on the line you just drew.


Next you will unfold the pinned edge, flip the pants over VERY CAREFULLY TO KEEP THEM LINED UP, and cut the other side to be the same length.  Be sure to leave the pins at the fold mark so you know where you are going to fold the finished edge to.
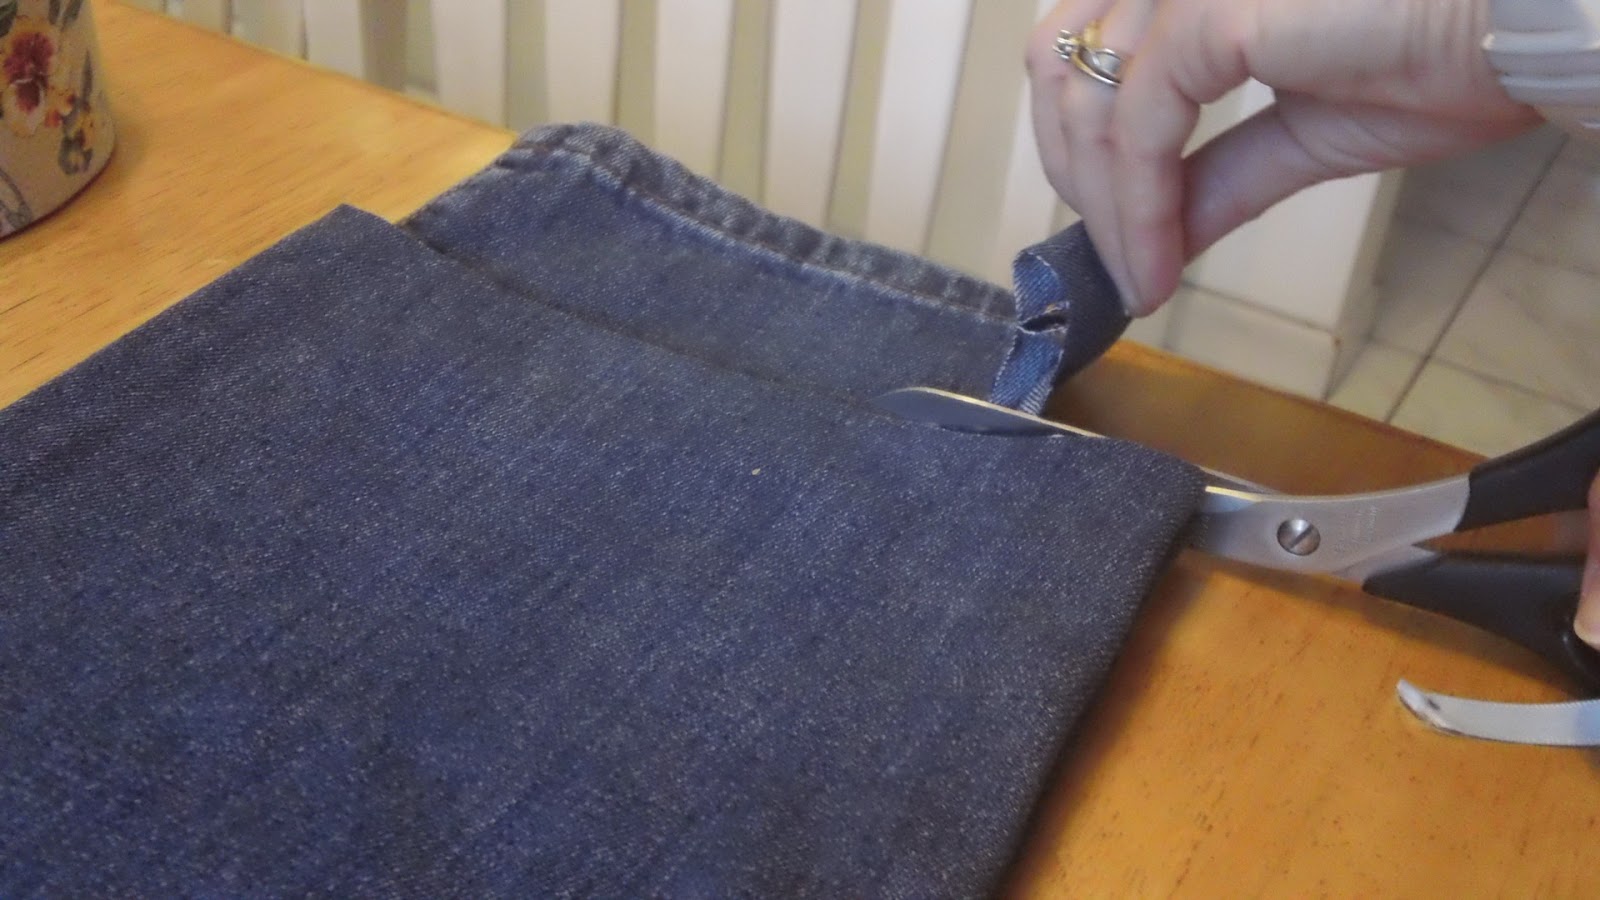

Now you will fold and pin the pants to the fold line you left with the pins.  Simply use the distance between the cut edge and the pin marked fold line to fold in half and then in half again.


Here is the two pant edges cut together with the pin markings left for the fold line.


Here is the pant edges, fold in half and in half again to meet those pin marked lines.  Sorry this picture turned out blurry.

Once you have pinned both pant legs to match, lay them flat together.  They should look something like this: 


You can use a dark thread to hem, or buy a thread at the fabric store that is sold as a denim coloured thread made by Guiterman threads.  See my thread in this picture:


Next adjust the presser foot pressure on your sewing machine to less than normal.  I have a quilting machine and it looks like this.   See how I reduced the presser foot pressure to less than normal.  
On your machine it is the little knob at the top of your machine over the needle area.  Please check your sewing machine manual for specific directions.


Now you will sew on the inside of the jeans to stitch the hem.  It will look like this:


Stitch in a circle around each pant leg until you have 2 hemmed legs.  You will need to REALLY SLOW DOWN at the thick part of the leg seams.  If your machine is more basic, you will have to hand crank these stitches.  It is worth it to save money if you ask me. On my machine I can back off the pressure when I get to these seams if I think I need to, and I can bring it a bit closer to normal for the other parts of the hem.

Take the time to get to know what your sewing machine can do.  Most machines have A LOT of capabilities if we take the time to learn.  

Your finished jean hem should look like this:


Here is one last picture of the finished job.


There it is!  You can hem your own jeans.  If you own a sewing machine, for the simple investment of some thread and tailor's chalk, you can side step the hemming fee at a local tailor and do the job yourself for less than half the price.  Once you have the thread the chalk, future hemmings are practically for free!

Happy Hemming!

Cassie


Thursday, September 13, 2012

I'm getting my Zoom Zoom on...

It's Thursday. There is a link party at the bottom of today's entry.

We all know that cars won't last forever.
I buy used vehicles, and I tend to pick up slightly older models because it fits my budget so well when I do.

This is my old friend.  And it was my very first car ever, all my own.
A 1998 Mazda Protege LX Touring Edition, automatic transmission.


While the body of the car looks ok except for some rust at the back wheel wells, it's the harsh Canadian winters with the salted roads that rot out the underside of the vehicles here.  My car was very old by today's standards.  It was a 14 year old car.  It has served me well and got me to many places safely and comfortably.  It was 8 years old when I bought it, and I enjoyed 6 years with this car.
It was a sad day when my mechanic was reviewing all the things that needed repair due to the under side aging.  We finally hit the point that my mechanic was advising me that it would be unwise to continue to repair this car.  It has finally hit the point that more and more major things can start to go wrong and the repairs cost more than the car is worth.

So I went shopping this week and I found this.


This is my new car to get me all the places I need to be.  Once again it's an older model, it's a 2003.
A 2003, Mazda Protege 5 Hatchback, with all the nice features that come standard on these cars, and it's a manual transmission this time. 
These cars have really great reviews.  I got it for a very fair price too.

Sadly...today I will say goodbye to my old friend, but I am very grateful for that car and how reliable it was.  Now I will get to enjoy my new car and I am sure to get a few good years out of this one too.

Thursdays I offer a link up party with the hopes that others will show me what they are up to also. 
Please feel free to add a link to your blog below.
Thanks for reading.

Cassie


Wednesday, September 12, 2012

How to patch a pair of jeans

Did you ever notice that jeans today fall apart, sometimes after only a few washings!
It's really annoying.
You find something that looks great and fits great, and between the stretch fabric that most denim is made with today and all the special wash treatments that give the denim that distressed look, the garment is in a compromised state before it even leaves the store.

Our son had a very nice pair of jeans with all the wrinkles at the front pockets that make it look like they are already old, and ALL the wrinkles tore apart after only about 5 washings.  Since we bought them at store that sells name brands for less, the manufacturer would not honour any sort of warranty either.  Disappointing.  These were so bad we couldn't fix them.  The tears were too large, so we had to throw them away.

This is not always the case.  There are lots of pants that can be fixed.  Today, I am going to show you a pair of pants that need repair in the seat area, and because of where the repair is, you don't even notice it when the hubby wears the pants.  Again, these pants are fairly new, and all these cool washes just make the fabrics so weak.

Here is the pants needing repair.


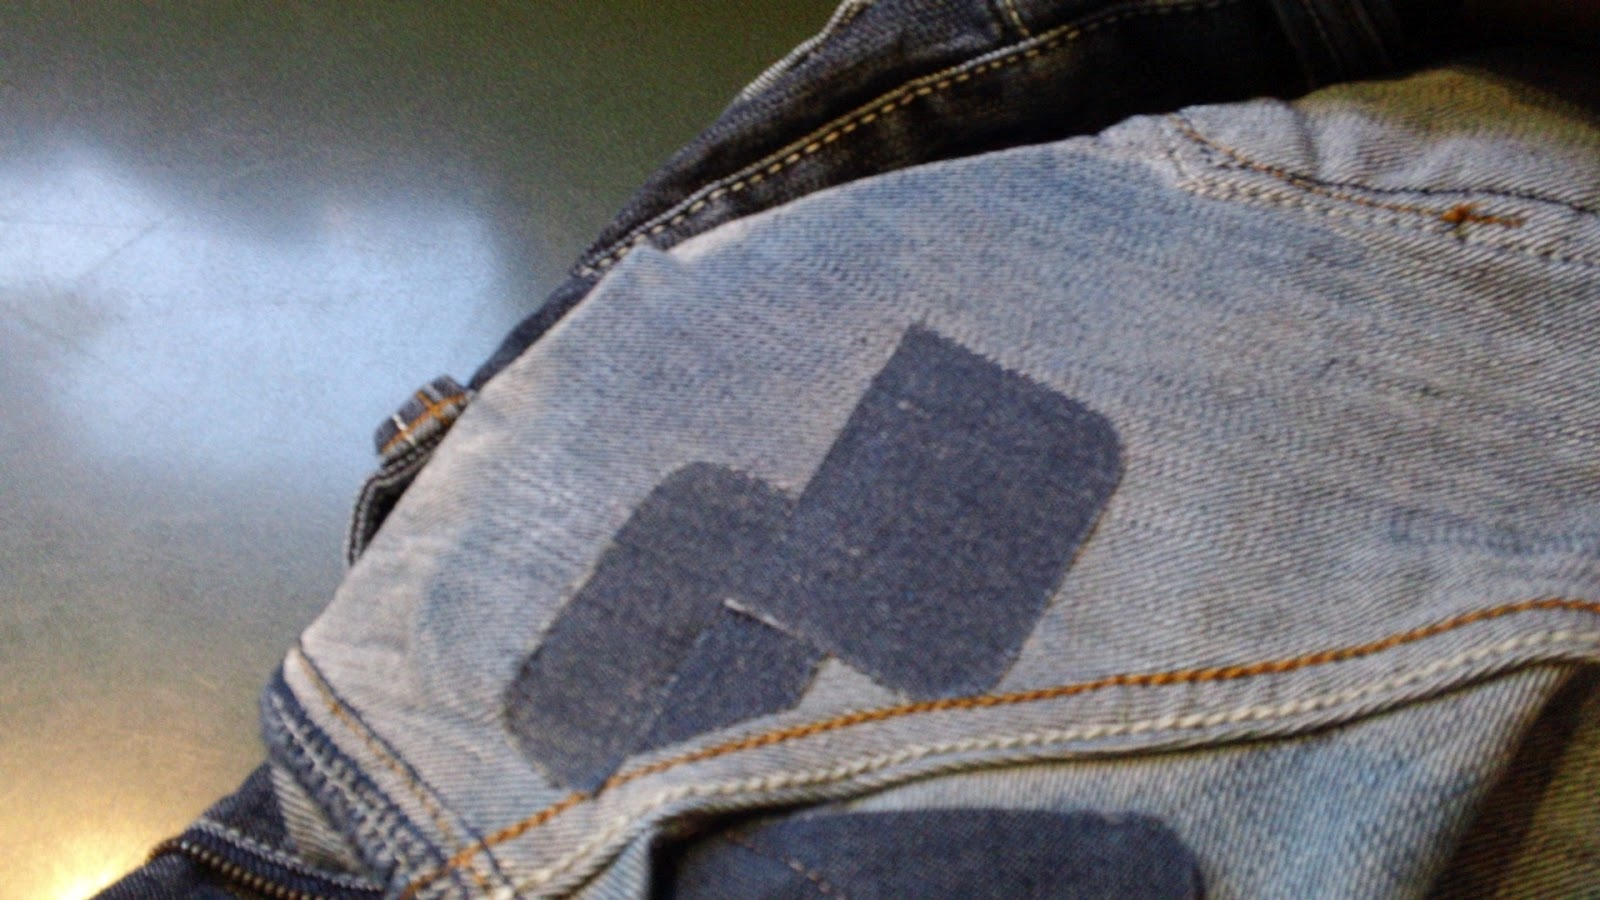
You can see they have already been repaired once.   I pull them out of the dryer and discovered a new area in need of repair.  

Here is how we do the fix… 

Buy some iron on patches in denim colours at your local fabric store.

Cut the patch to a shape and size suitable to the area needing repair. 


I ended up cutting 2 patches to cover the area.  Next heat your iron and turn off the steam function.  Iron the patches into place.


Next you must duplicate this work on the inside of the pant, or it won't be strong enough.  Cut patches to cover the same repair area on the inside of the pant.  Iront those into place too. 


And for the final step, you must stitch this around the edges of the patch.  I recommend doing this from the outside of the pant.  If you don't stitch it, the patch can eventually give way in the laundry.  Stitching the edges of the patch will also further strengthen the repair.

Your finished project should look something like this. 


Now you can see that when I fold the pants, you can't see these repairs.  When my hubby will wear these jeans, the repair really isn't noticeable, unless you're the height of a toddler!  LOL!


Now you can save some money by repairing jeans too.
Supplies needed:

1. Denim in need of repair
2. Iron-on denim patches
3. Scissors to cut the patches
4. Iron and ironing board
5. Sewing machine
6. Either denim thread (yes, you can buy that) or dark coloured thread to match the pant.


Happy mending!

Cassie


Monday, September 10, 2012

How to Organize your Homework.

I had a reader ask for some advice on how to organize homework.  Since I have 2 youths in the house, one in grade 8 and the other in grade 9, this topic is close to home.

My kids are both honour roll students.  They each achieved this last year, and now that my husband and I know they are capable of this, we kinda hold them to it! LOL!


You will find a large selection of homework organizing information available for grade school students in their primary years of school.  There are plenty of blogs that cover the younger grades.  Not as much out there for the higher grades.  I found this article on line, and while I considered re-writing it to my own words, the more I read it I felt that she says it all quite well herself.  Please find attached below an article with good solid advice for students in middle school, high school and beyond that will help you establish a firm base for your homework routine.

You can read below, but I have also provided the direct link HERE.

High School Organization Techniques for Homework and Studying

Organize for Less Stress and Better Grades

I remember when school use to be carefree. Frolicking, storybooks, and crayons were the tools I used to learn. Then, the fun stopped and I entered first grade. Once I got to high school, stress was an every day event, but then I learned some organization techniques that helped lower my stress and raise my grades.

Organize your High School Materials

Office Depot became my organizational friend in high school. While strolling through the isles one day, I devised an organization system that served me well into my college days. I started by choosing a color for each high school class. Green was for science, blue for history, and red for math. Based on my color selection, I purchased a 1" 3 ring notebook, big dots, and some dividers for each class. I also bought a large desk calendar. With my purchases in hand, I had the tools for high school class organization.
In the 3 ring binders, I placed ordinary notebook paper, some dividers and wrote the high school class name along the binding and on the cover. I named the dividers based on the class organization. For example, for my math class, I had a notes section, a class work section, and a homework section. I would hole punch any assignments or handouts and place them in the correct section. For classes that had a syllabus, I would place it at the front of the notebook for easy reference.
Once I organized my binders, I organized my large desk calendar. I took the syllabus from each high school class and wrote every assignment, test, and presentation on a big dot and placed it on the calendar according to the due date. At a glace, I was able to see when I had multiple homework assignments or tests on the same day. When I could see the ebb and flow of assignments, I learned to be proactive in my homework assignments and studying. By being proactive, I decreased my high school stress and ultimately raised my grades.

Organize your High School Study and Homework Time

In high school, I was the queen of after school activities. I was a tutor, took piano lessons, served in multiple organizations, and participated heavily in the Junior Achievement company program. With this hectic schedule, I learned to carefully organize my high school homework and study time.
For my homework assignments, I learned to utilize down time. For example, in many of my classes, I had a few minutes after the lesson was over before I had to change to my next class. During this time, I had a homework assignment handy and I would work until the bell rang for my next class. By doing this consistently, I usually had my math homework finished before school ended for the day. I also found times during lunch, or after finishing a classroom assignment to work on homework. For homework assignments that needed more attention such as writing an essay, I would jot down ideas that I could use when I sat down at night to work on the homework assignment.
Repetition is the key to learning most things in high school classes. When I studied, I would make note cards of key items that I could pull out and study anywhere. For many tests, I used my note cards to study on my way to school as well as the few minutes before a test started. These note cards served two purposes; they made me organize the key points, but also served as a way to refresh my memory before a test started. These note cards helped to reduce my stress, and raise my high school grades especially on tests.
Also, it is important when you study to find a place conducive to your study style. Some people need absolute quiet to study effectively, while others do best with some background noise. My best study time was when I had some music in the background and had no interruptions. Focus is also important when studying. It is easy to let your mind wander when you are studying, especially if you have distractions where you study. Find one place where you study routinely and remove any items that cause a distraction. When you sit down to study, tell yourself you will focus for a certain period of time and don't let your mind wander. Once you have organized your mind for studying, you will finish your studying faster and will retain more information. Overall, when your high school studying is organized, you will have less stress and higher grades.

Conclusions to High School Organization Techniques for Homework and Studying

Overall, if you want to have less stress and higher grades during high school, make sure to find an organizational system that works for you. While the techniques I mentioned worked for me, you must find an organization system that fits your schedule and style. Once you find your system, you will be amazed at how your stress level declines and your grades rise.
Reference: Trial and Error during my time in High School.
Published by Laura Acevedo
Laura Acevedo writes from a professional and academic background with experience in finance, information technology, marketing and international business. Acevedo holds an MBA in International Business from...  View profile

There you have it!  Start your school year off right.  

- Create a system that works for you. 
- Make time to be organized.
- Stick to your routine.
- If you need help, seek guidance from your teachers early.  Don't delay.

Thanks for reading.

Cassie
Related Posts Plugin for WordPress, Blogger...